What Are Sound Panels for Office and How Do They Work?

Open-plan offices often sound productive before they feel productive. Keyboard clicks, ringing phones, and nearby conversations overlap across hard surfaces. This constant noise can make concentration difficult, especially during detailed work or online meetings. Sound panels for office spaces help manage this problem by absorbing reflected sound energy. They reduce echoes and shorten reverberation, rather than creating complete silence. That distinction matters.

Most panels use fibrous or porous materials, such as recycled PET felt, mineral wool, or acoustic foam. When sound reaches the panel, air movement enters its surface and loses energy through friction. The result is a calmer room with clearer speech. Imagine a meeting table where voices no longer bounce sharply from the ceiling and glass walls. Small details become easier to hear.

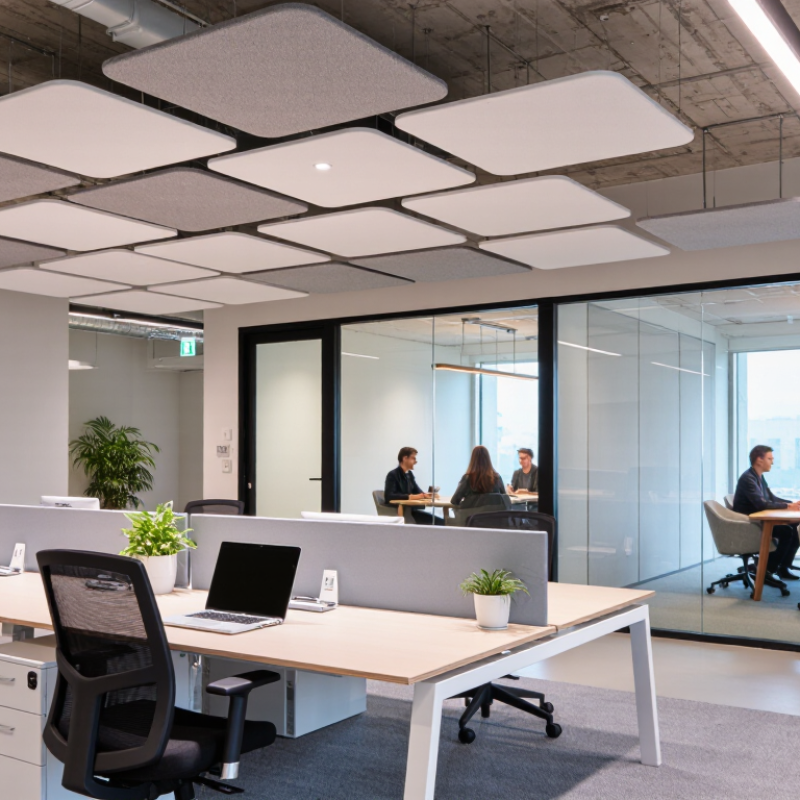
However, panels are not a magic solution. They cannot fully block noise from another room or stop every loud conversation. Effective planning considers panel thickness, coverage, ceiling height, furniture, and the room’s existing surfaces. Placement near speaking areas often improves speech clarity, while ceiling clouds can control overhead reflections. Independent acoustic testing, including absorption ratings such as NRC, provides useful evidence. Yet ratings do not predict every office perfectly.

In practice, the best results usually come from combining panels with softer furniture, thoughtful space planning, and reasonable workplace behavior. Even experienced teams can misjudge a room. Listening, measuring, and adjusting remain essential. A quieter office is designed, not simply decorated.
What Are Sound Panels for Office and How Do They Work?

What Are Office Sound Panels and What Problems Do They Address?

Office sound panels are acoustic surfaces designed to reduce reflected sound, not eliminate every noise. Most use porous cores that convert part of sound energy into tiny amounts of heat. They soften speech, ringing phones, and chair movement. The result is shorter reverberation and clearer conversations. Less echo.

This matters because noise changes how people use a workplace. A 2018 Harvard Business School field study found that face-to-face interaction fell by about 70% after employees moved into open offices. Electronic communication increased instead. The finding does not prove that panels alone solve open-plan problems. However, it shows why speech control deserves practical attention. The Leesman Index, based on extensive workplace survey data, also repeatedly identifies acoustics as a weak-rated office feature. Employees notice it.

Placement requires professional judgment. Panels near ceilings, hard walls, and conversation zones can absorb repeated reflections. Larger, thicker panels usually perform better at lower frequencies. ISO 3382-3 provides measurement methods for open-plan offices, including spatial decay of speech. Designers should measure the room before selecting products. A few decorative panels may look useful but achieve little. They will not block a nearby printer or create privacy around a meeting table. That is the uncomfortable part. Acoustic improvement depends on coverage, spacing, room geometry, and user behavior. A quiet office is rarely created by one installation.
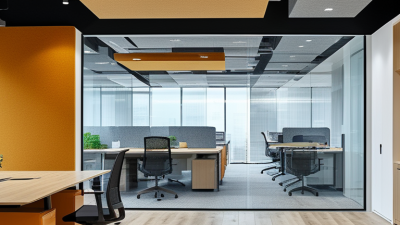
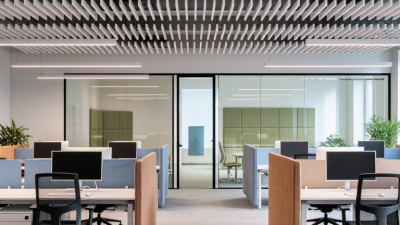
What Are Sound Panels for Office and How Do They Work?

Office sound panels are porous acoustic treatments designed to absorb reflected sound. The chart compares representative sound absorption coefficients at 500 Hz, a frequency range important for speech clarity. Higher values indicate that more sound energy is absorbed instead of reflected around the room.

Hard surfaces such as painted concrete and glass reflect most speech energy, which can increase reverberation and reduce speech intelligibility. Fabric-wrapped mineral wool panels absorb substantially more sound, helping control echo, improve speech clarity, and reduce the buildup of background noise. Actual performance varies with thickness, mounting method, coverage, and room layout.

How Do Sound Panels Control Noise in Office Environments?

In a busy office, noise rarely comes from one source. Voices bounce between glass, desks, and hard ceilings. Sound panels control this noise by absorbing those reflections. Most panels contain porous materials that allow sound waves to enter. Inside, the waves lose energy through friction and become small amounts of heat. The room then has less reverberation, so conversations sound clearer and less tiring.

Placement matters more than many people expect. Panels work well on walls near conversation areas and noisy equipment. Ceiling panels can reduce sound traveling across open workspaces. Panels placed opposite large reflective surfaces can also limit repeated echoes. A practical listening check helps identify troublesome areas. For dependable results, acoustic professionals may measure reverberation time before and after installation.

They do not block every sound. Sound absorption and sound insulation are different tasks. A thin panel cannot stop a printer from transmitting vibration through a wall. Door seals, partitions, carpeting, and quieter equipment may also be necessary. The imperfect part is planning. Covering one wall may look effective but still leave a loud ceiling untreated. Office activity changes throughout the day, so an early morning assessment can give misleading results. Real improvement often requires observing the space during busy hours.

What Materials and Designs Are Used in Office Sound Panels?

Office sound panels usually combine a porous core with a durable outer finish. Common cores include PET felt, mineral wool, and fiberglass. These materials trap sound energy inside small air spaces. Hard surfaces, such as wood, may be perforated or slotted to expose an absorbent backing. Solid wood alone reflects sound rather than controlling it.

Panel performance should be checked through laboratory data, not appearance. ASTM C423 testing reports absorption across frequency ranges, while ISO 354 supports comparable reverberation measurements. An NRC near 0.80 indicates strong average absorption, although it does not describe every frequency equally. WELL v2 acoustic criteria commonly target reverberation times around 0.6 seconds in open work areas. That figure matters near meeting tables, where speech quickly becomes tiring.

Design changes the result. Ceiling clouds reduce overhead reflections, while wall panels soften voices traveling across desks. Baffles can interrupt sound paths without consuming wall space. Thicker panels generally absorb lower frequencies better, but placement still matters. A thin panel behind a monitor may help locally, yet leave the room loud.

A panel is not a magic eraser. Real fit-outs sometimes overuse decorative felt and under-treat ceilings. That is an expensive lesson. Source data from ASTM reports, ISO methods, and WELL documentation should guide spacing, thickness, and coverage.

Where Should Sound Panels Be Installed for Better Acoustic Results?

What Are Sound Panels for Office and How Do They Work?

Sound panels absorb reflected sound, reducing echo and improving speech clarity. They are most effective when placed near the strongest reflection points, not scattered randomly. In a meeting room, install panels on the side walls beside the speaker and listeners. These surfaces often bounce voices across the table. Ceiling panels can also help when hard floors and glass walls create a sharp, tiring reverberation.

For better acoustic results, position panels on opposing parallel walls, especially in open offices and training rooms. Place additional panels behind the speaker to limit sound reflections toward the audience. Avoid covering every wall. Some controlled reflection keeps a room natural and comfortable. A quick clap test can reveal echo, although it is not laboratory data. Professional acoustic measurements provide more dependable guidance, particularly in large spaces.

Tips: Sit in the usual listening position and ask someone to speak from the front. Listen for fluttering echoes and muffled words. Mark the surfaces that reflect sound most clearly. Install panels there first. Leave doors, ventilation openings, and safety equipment unobstructed. Panel height also matters; placing them near ear level usually improves speech absorption. Results may differ after furniture changes, so review the room again. One overlooked cabinet can alter the sound.

What Are Sound Panels for Office and How Do They Work? - Where Should Sound Panels Be Installed for Better Acoustic Results?

Indicative office acoustic planning data. Actual performance depends on room size, finishes, occupancy, panel spacing, and installation quality.
Office Area or Condition Main Acoustic Problem Recommended Panel Characteristics Where to Install How the Panels Work Practical Acoustic Target
Open-plan office
Large shared workspace with multiple desks
Speech distractions, sound spreading across workstations, and excessive reverberation Porous fabric-wrapped panels, typically 25–50 mm thick, with a high sound-absorption rating such as NRC 0.70–0.95 On walls beside desk clusters, along long reflective walls, and as suspended ceiling clouds above noisy zones Absorbs reflected sound energy and reduces the distance over which speech travels Create distributed absorption rather than concentrating every panel on one wall
Private office
Small room with hard wall, glass, or door surfaces
Flutter echo, telephone reflections, and sound buildup between parallel surfaces 25–50 mm wall panels with fabric covering; add an air gap of approximately 25–50 mm where possible On the wall behind the user, the wall opposite the desk, or one of two parallel walls Interrupts repeated reflections that create ringing and improves speech clarity Treat at least two reflective surfaces when flutter echo is noticeable
Meeting or conference room
Voice communication and video calls
Echo, reduced speech intelligibility, and microphone pickup of reflected voices Wall panels with NRC approximately 0.80–0.95; combine with a ceiling cloud when the ceiling is hard and reflective On the front and rear walls, side-wall reflection points, and above the central table if feasible Controls early reflections reaching listeners and microphones, making speech clearer Prioritize the first-reflection zones and maintain balanced absorption around the room
Phone booth or focus room
Compact enclosed space
Voice reflections inside a small volume and sound leakage through lightweight partitions High-absorption panels on several surfaces; thicker treatment or ceiling coverage may be useful Behind the speaker, on the opposite wall, and on the ceiling or upper side walls Reduces internal reverberation; it does not provide full soundproofing by itself Use absorption for room control and separate construction measures for privacy
Reception or waiting area
Public-facing space with hard finishes
High background noise, hard-surface reflections, and reduced conversational comfort Durable, cleanable panels or acoustic ceiling elements with NRC around 0.70–0.90 Large bare walls, the ceiling above seating, and areas near service counters Lowers reflected sound and helps prevent noise from accumulating in the open area Combine wall and ceiling absorption when flooring and furniture are highly reflective
Corridor or circulation zone
Long passage with parallel walls
Sound propagation along the corridor and repeated wall reflections Impact-resistant vertical panels, approximately 25–50 mm thick, distributed along the corridor Alternate panels on opposing walls or install panels on one wall with ceiling absorption Breaks up reflection paths and reduces the corridor’s “tunnel” effect Avoid placing all treatment at one end; distribute it along the sound path
Hard-surface room
Glass, concrete, stone, or exposed metal finishes
Long reverberation time and strong reflections from multiple surfaces Broadband porous panels, ceiling clouds, and selected wall treatment; use an air gap to improve low-frequency absorption Ceiling first when it is uninterrupted, then the largest bare wall areas and reflection points Converts part of the reflected sound into small amounts of heat within the porous material Use a mix of ceiling and wall absorption for more even room response
Ceiling with exposed services
Ducts, lighting, or open structure
Limited ceiling absorption and noise reflected between floor and ceiling Suspended acoustic clouds or baffles with exposed upper surfaces; maintain safe clearance from services Directly above workstations, meeting tables, or other primary communication areas Adds absorption overhead while preserving access to lighting, ventilation, and maintenance systems Cover the most active acoustic zones instead of treating only the room perimeter
Key measurement notes: NRC is a laboratory-based measure of mid-frequency sound absorption, commonly averaged at 250, 500, 1,000, and 2,000 Hz. Sound-absorbing panels reduce reverberation and reflected sound inside a room; they do not, by themselves, block noise passing through walls, doors, ceilings, or windows.

How Can Businesses Choose and Maintain Office Sound Panels?

Office sound panels absorb reflected sound, reducing echoes between walls, ceilings, and hard desks. Choosing the right panels starts with the room’s actual problems, not appearance alone. Walk through the space during busy hours. Notice harsh voices, ringing calls, or sound spilling from meeting rooms. Panels with suitable absorption ratings can soften these reflections and improve speech clarity.

Measure the room before ordering. Large open offices may need a combination of wall and ceiling panels, while a small meeting room may need fewer, thicker units. Consider panel density, moisture resistance, fire performance, and cleaning requirements. These details affect safety and service life. Installation also matters. Panels placed near major reflection points usually work better than panels arranged randomly. Still, perfect coverage is unrealistic. Some offices discover that furniture placement matters more than expected.

Tips: Keep panels away from blocked air vents. Dust them gently with a soft brush or vacuum attachment every few weeks. Check edges, fasteners, and fabric for loosening or stains. Do not saturate acoustic materials with water. A slightly damp cloth is safer for suitable surfaces. Recheck the room after installation, especially when desks or partitions move. The first layout may need revision. Use staff feedback, simple sound measurements, and maintenance records to guide adjustments. Good acoustics require observation, not one purchase.